Push

DFINERY uses Firebase Cloud Messaging to receive push notifications, so your application needs to integrate with Firebase.

Before you start

Register whether to allow receiving push notifications

In the case of push notifications for advertising purposes, prior consent must be obtained from the user in accordance with the Information and Communications Network Act . In order to register with DFINERY that the user has permitted push notifications, please perform the following series of tasks.

  1. Notify users to allow push notifications

  2. Register the value of the user's permission/rejection intention in the user profile.

Please refer to Setting consent to receive notifications and enter values ​​for the items to which the user has consented. The code below is an example of allowing consent to receive informational and advertising messages for push channels.

Map<String, Object> consents = new HashMap<>();
consents.put(DFUserProfile.PUSH_OPTIN, true);
consents.put(DFUserProfile.PUSH_ADS_OPTIN, true);
DfineryProperties.setUserProfiles(consents);

Registering Firebase information in the console

In the DFINERY console , go to Additional Settings/Channel Additional Settings/Push/Android Settings Management, enter the sender ID, and upload the Firebase user authentication information private key file in JSON format.

Adding Support Library Dependency

DFINERY requires the Support Library to create push notifications, so complete the following series of steps:

  1. Open a build.gradle file inside your app's module directory.

  2. Add Support Library dependency to dependencies.

 dependencies {
    implementation 'androidx.core:core:1.9.0'
}

Firebase Cloud Messaging Integration

Add Firebase to your Android project

Add Firebase to your Android project by following the instructions in Add Firebase to your Android project provided by Firebase.

Setting up Firebase Cloud Messaging

Follow the instructions in Setting up a Firebase Cloud Messaging client app on Android provided by Firebase, and apply the following:

Linking tokens to DFINERY

To link a token issued by Firebase to DFINERY, please write as follows.

FirebaseMessaging.getInstance().getToken().addOnCompleteListener(new OnCompleteListener<String>() {
    @Override
    public void onComplete(@NonNull Task<String> task) {
        if (!task.isSuccessful()) {
            Log.w(TAG, "Fetching FCM registration token failed", task.getException());
            return;
        }

        // Get new FCM registration token
        String token = task.getResult();
        DfineryProperties.setPushToken(token);
    }
});

Integration when monitoring token generation

Override the onNewToken(String) method in a class that inherits FirebaseMessagingService to register the token in DFINERY.

@Override
public void onNewToken(@NonNull String token) {
    Log.d(TAG, "Refreshed token: " + token);
    DfineryProperties.setPushToken(token);
}

Connecting push notification channels to DFINERY

Create a push notification channel

Starting with Android 8.0, you need to create a notification channel to receive notifications. Please refer to the instructions in Creating and Managing Notification Channels provided by Android and Creating a Notification Channel.

Register the created push notification channel ID

Register the ID of a notification channel created using the setDefaultNotificationChannelId() method of DfineryConfig or using res/values/dfinery.xml using.

DfineryConfig config = new DfineryConfig.Builder()
    .setDefaultNotificationChannelId("NOTIFICATION_CHANNEL_ID")
    .build();
Dfinery.getInstance().init(this, "SERVICE_KEY", config);

Setting up push notification icons

To display push notifications, you need to set an icon. Please setNotificationIcon() use the method of DfineryConfig or res/values/dfinery.xml use to set the icon.

DfineryConfig config = new DfineryConfig.Builder()
    .setNotificationIcon(R.drawable.icon)
    .build();
Dfinery.getInstance().init(this, "SERVICE_KEY", config);

Processing push notifications

When a push is received, a push notification is received by an object that inherits FirebaseMessagingService. DFINERY creates a notification based on the received push payload, so please write the following in the onMessageReceived(RemoteMessage) method of the object.

@Override
public void onMessageReceived(@NonNull RemoteMessage remoteMessage) {
    super.onMessageReceived(remoteMessage);
    if(Dfinery.getInstance().handleRemoteMessage(getApplicationContext(), remoteMessage.getData())){
        //dfinery push
    }else{
        //This is not a push notification sent from Dfinery.
    }
}

Handling push notification clicks

When you click on a push with deep link information, the Activity set in the deep link will be executed. If the deep link has no information, android.intent.action.MAIN the Activity with the action will be executed.

For information on how to associate a deep link with an Activity, see Creating App Content Deep Links on Android.

Complete

Push settings are complete.

Learn more

Follow the steps to create a notification channel

Here is an example of creating a notification channel. There is also an example provided by Android , so please refer to it.

1. Create a notification channel.

The notification channel API is supported on Android 8.0 and higher.

  • The first parameter id represents the ID of the notification channel.

  • The second parameter, name, is the name of the notification channel. This value Settings/Notifications is exposed to the user in.

  • The third parameter importance indicates the importance of push notifications that will be received through this notification channel.

NotificationChannel notificationChannel = new NotificationChannel("NOTIFICATION_CHANNEL_ID", "NOTIFICATION_CHANNEL_NAME", NotificationManager.IMPORTANCE_HIGH);

2. Set a description for the notification channel. (Optional)

The value Settings/Notifications is exposed to the user in.

notificationChannel.setDescription("NOTIFICATION_CHANNEL_DESCRIPTION");

3. Set whether the notification channel vibrates or not. (Optional)

The value of the notification channel always takes precedence over all settings set in the DFINERY console except 'Expose push messages while the app is running'.

notificationChannel.enableVibration(true);

4. Set the notification sound for the notification channel. (Optional)

Here's an example of setting the system default notification sound to play.

Uri soundUri = RingtoneManager.getDefaultUri(RingtoneManager.TYPE_NOTIFICATION);
AudioAttributes audioAttributes = new AudioAttributes.Builder()
        .setUsage(AudioAttributes.USAGE_NOTIFICATION)
        .build();
notificationChannel.setSound(soundUri, audioAttributes);

5. Register the created notification channel in NotificationManager.

NotificationManager notificationManager = (NotificationManager) getSystemService(Context.NOTIFICATION_SERVICE);
notificationManager.createNotificationChannel(notificationChannel);

6. Done.

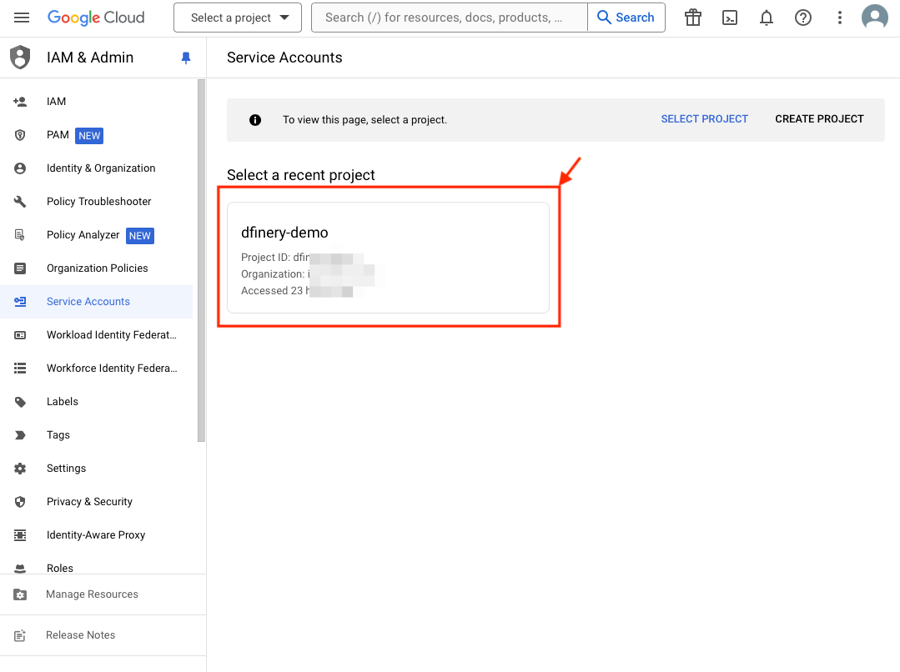
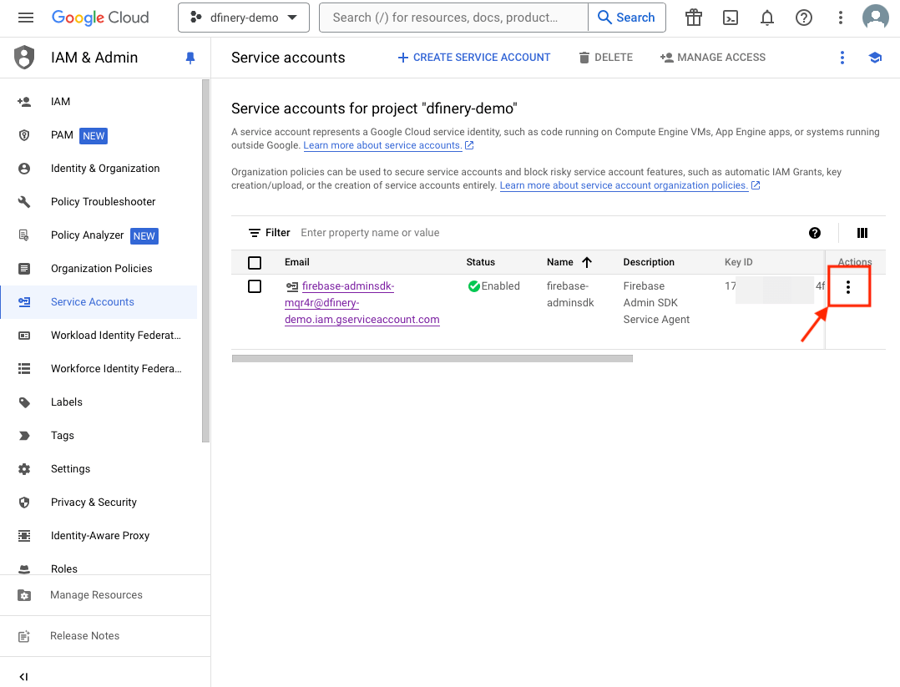
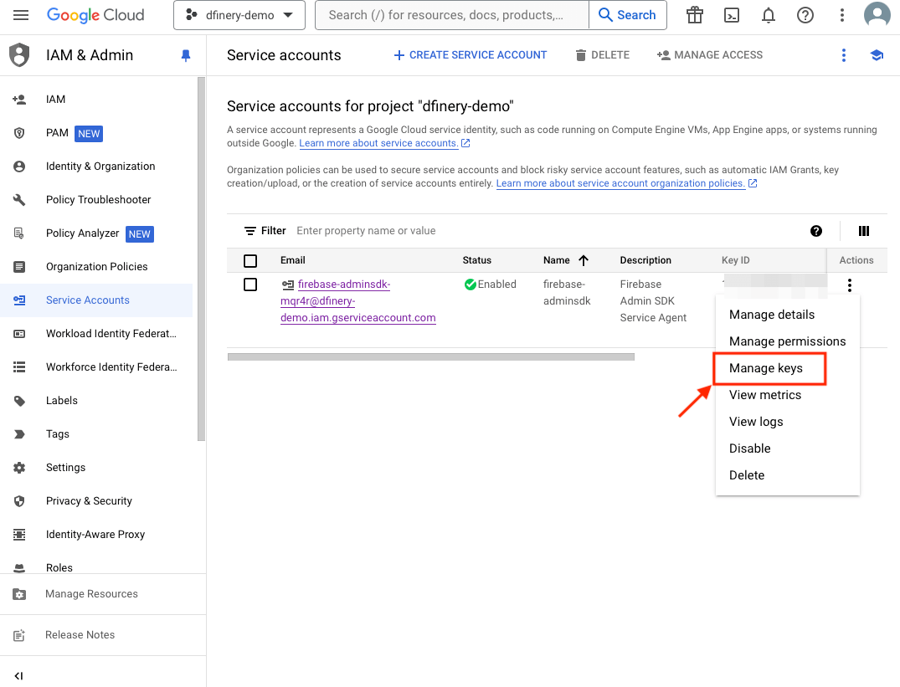
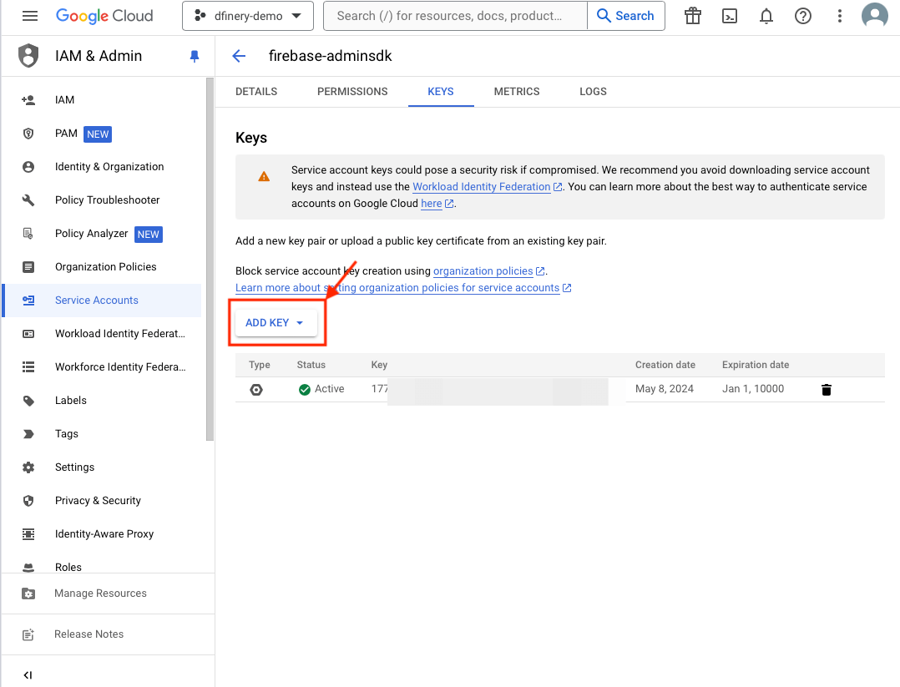
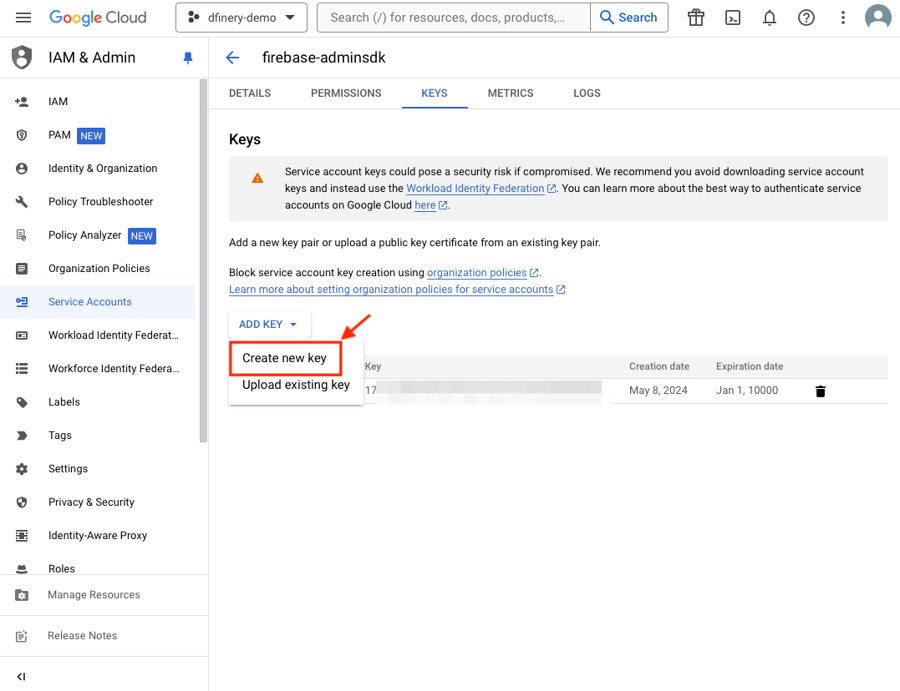
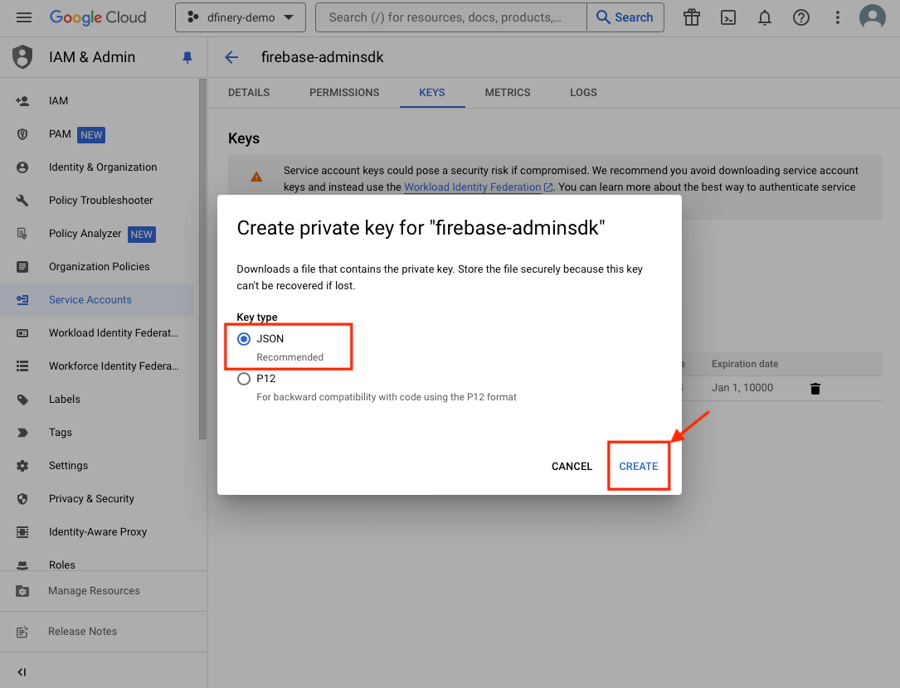
How to issue a Firebase user authentication private key file

1. Log in to the service account.

2. Select the project for which you want to issue a key.

If there is no project, it means that the Firebase project has not been created. Refer to Add Firebase to your Android project to create a Firebase project.

3. Click ⋮ in the Actions section at the bottom right.

4. Click Key Management from the drop-down.

5. Select Add Key.

If there is a key already created, it means that there is a history of creating a key in the past and you can use that key. If you cannot find the key, please create a new key.

6. Click Create New Key from the dropdown.

7. Select JSON and click Create.

8. Key issuance is complete.

How to check caller ID

  1. Select a project.

  2. In the left panel, click the ⚙️ icon to the right of the project overview.

  3. Click Project Settings.

  4. In the Project Settings top tab, click Cloud Messaging.

Last updated