사용자 가이드
User GuideDeveloper GuideAPI Guide🏠
English
English
  • ☄️Learn about DFINERY
  • ⚙️Getting started with Dfinery
    • Sign Up
    • Create organizations and services
    • Setting up security
      • Setting up 2-step authentication
      • Setting up CSV downloads
    • Organization Management and Authority
      • Invite and set permissions
      • Frequently Asked Questions FAQ
    • Creating events and properties
      • Designing an Event Taxonomy
      • Testing SDK Integration
      • Testing S2S API Integration
      • Frequently Asked Questions FAQ
    • Partner Integration
      • Partner Sync (Export)
        • Creating a Pipeline
        • Frequently Asked Questions FAQ
      • HTTP API (Export)
    • Console Screen Guide
  • 📊Analysis
    • Home Dashboard
      • Frequently Asked Questions FAQ
    • Report
      • Create an Insight Report
      • Summary of Report Terms and Concepts
      • Action Common FAQ
  • 📢Action
    • Off-site Campaign
      • Push message
        • Setting up push
        • Sending push messages
        • Frequently Asked Questions FAQ
      • kakaotalk
        • Setting up a KakaoTalk sending profile
        • Notification Talk
          • Create a notification template
          • Send notification message
          • Notification Talk Indicator
        • FAQFrequently Asked Questions FAQ
      • Text message
        • Register your caller ID profile
        • 080 Rejection
        • Send a text message
        • Frequently Asked Questions FAQ
      • Informational VS Advertising
      • 🚦(Must read) Notation by consent status
      • Fatigue management
    • On-site Campaign
      • In-app messages
        • Create an in-app message
        • In-App Message Size Guide
        • Priority Management
        • Frequently Asked Questions FAQ
    • Set the purchase conversion period
      • Frequently Asked Questions FAQ
    • Campaign setup information and result details data
    • Action Common FAQ
  • 🙋Customer
    • User Profile 360
      • Frequently Asked Questions FAQ
    • Audience
      • Audience Filter Rules
      • Dynamic Audience (Parameter Update Setting)
      • Audience creation example
      • Frequently Asked Questions FAQ
  • etc.
    • Glossary
    • Frequently Asked Questions FAQ - Other Common
Powered by GitBook
LogoLogo

디파이너리 팀은 고객의 편의와 성장을 위해 최선을 다하고 있습니다.

  • 도입 문의
  • 이용 문의

디파이너리|㈜IGAWorks

On this page
  • Manage iOS Settings
  • Time To Live (TTL) Management
  1. Action
  2. Off-site Campaign
  3. Push message

Setting up push

PreviousPush messageNextSending push messages

Last updated 2 months ago

Additional settings for sending push messages are required for each platform (Android, iOS).

Manage Android Settings

Register Firebase's FCM authentication token for Android push delivery. The certificate can be issued in the Firebase console.

FCM Certificate Issuance (Android)

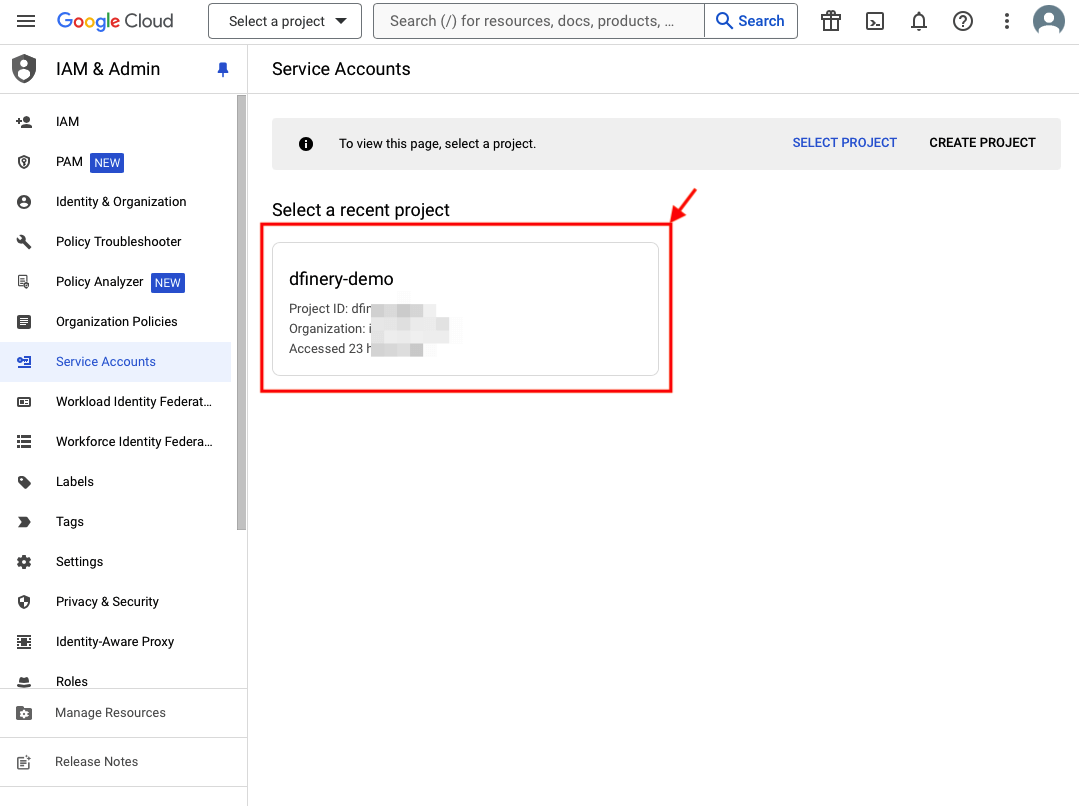
  1. Log in to the service account.

  2. Select a project. If you don't have a project, create a new one.

  1. Click ⋮ in the Actions section at the bottom right.

  1. Select [Manage keys] from the drop-down menu.

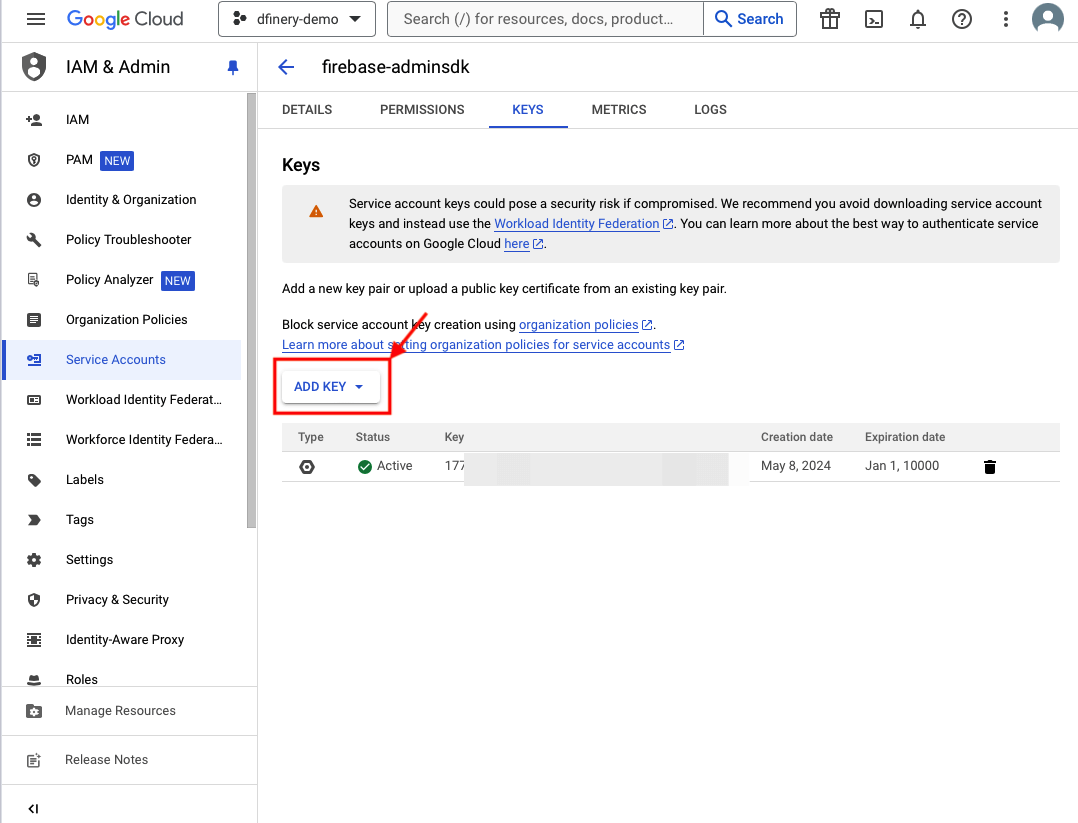
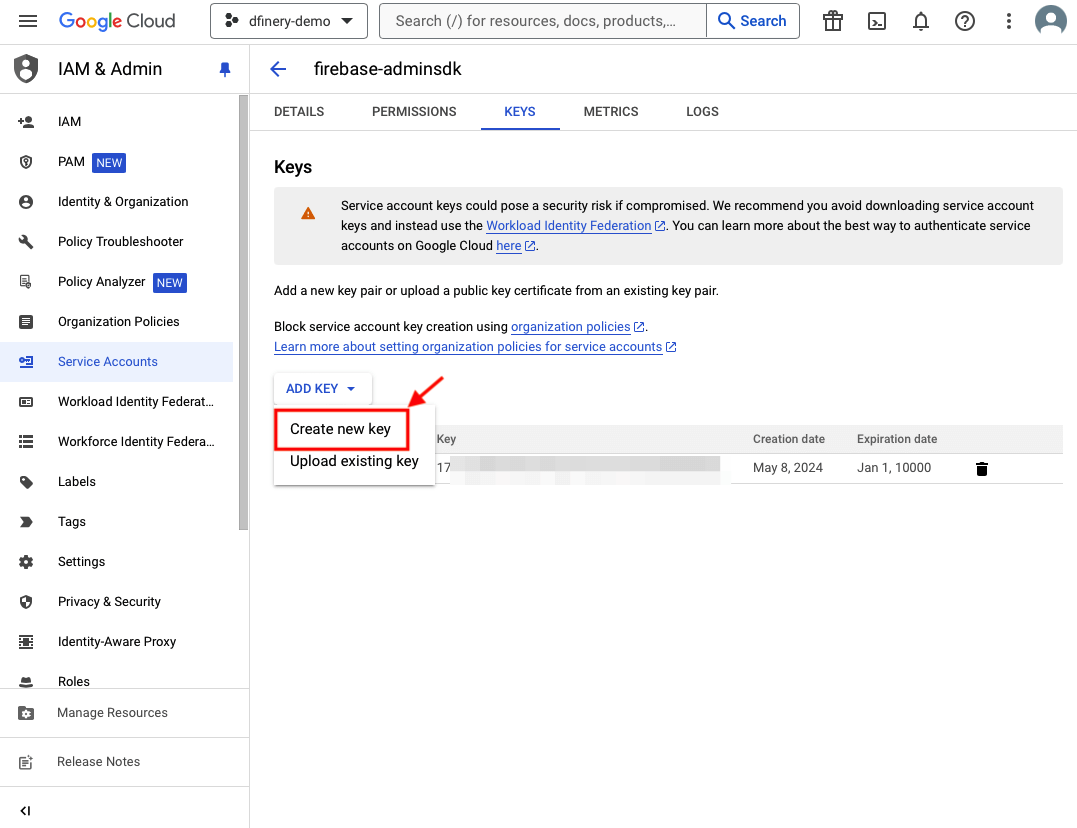
  1. Select the [ADD KEY] button and select [Create new key] from the drop-down menu.

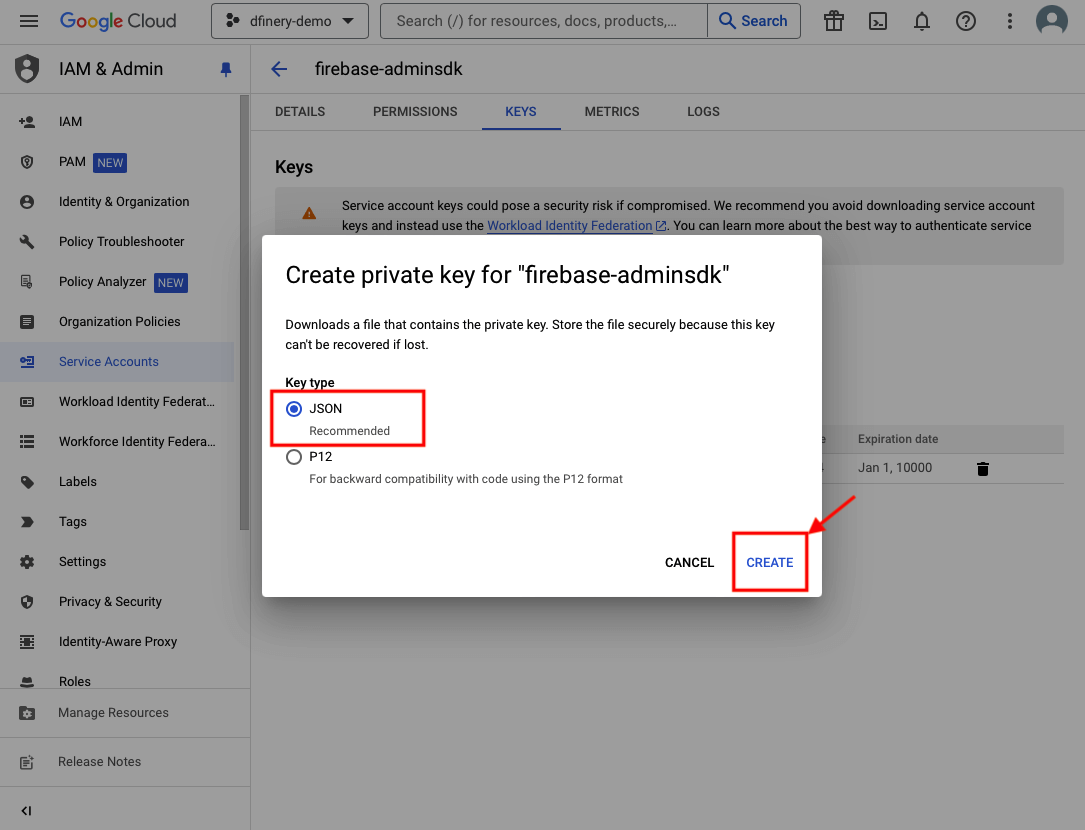
  1. Select JSON in Key type and click [Create new key].

  1. Select the JSON type and click the [CREATE] button to issue the certificate.

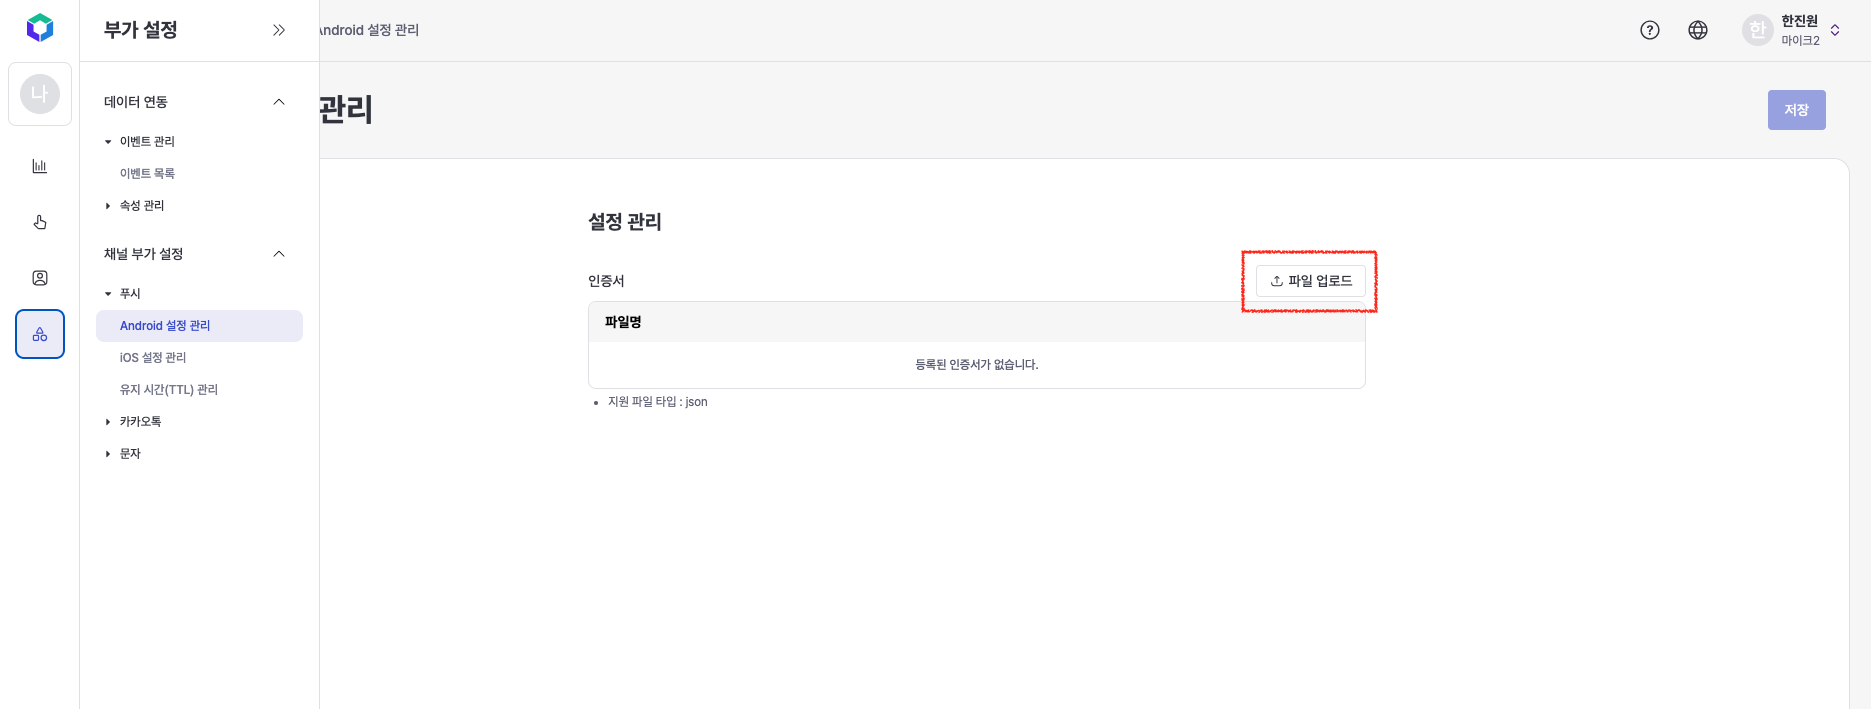
Registering the issued certificate

  1. Go to Additional Settings > Channel Additional Settings > Push > Manage Android Settings screen.

  2. Click the [Upload File] button to register the issued FCM certificate.


Manage iOS Settings

Register Apple's APNs authentication key for iOS push notifications. The certificate can be issued from the Apple Developer Console.

Issuing APNs authentication key

  1. In Certificates, Identifier & Profiles, select [Key (English)].

  1. Select the Keys menu on the left and select [Create a key] to issue a key. Enter a Key Name and activate the Apple Push Notifications service (APNs).

  1. When you click Register, an authentication key will be issued.

  1. Download the issued authentication key.

Register the issued APNs authentication key

  1. Go to Additional Settings > Channel Additional Settings > Push > Manage iOS Settings screen.

  2. Click the [Upload File] button to register the APNs authentication key you received.

  1. Enter all Key ID, Team ID, and Bundle ID.

​

Time To Live (TTL) Management

What is Time To Live (TTL)?

Time to Live (TTL) is the maximum time to wait to ensure message delivery when the device is offline. Time to Live (Time to Live) management can optimize message delivery by specifying the message delivery validity time (hours). After the set TTL time has elapsed, the message is no longer valid and will not be delivered to the device.

Time To Live (TTL) Global Setting Conditions and Details

  • TTL applies only to push channels and can be configured for each platform.

  • Automatically applied to campaigns created after TTL setting.

  • Bulk settings are available for all campaigns.

  • Changed settings will not be applied to campaigns created in the past.

  • You can individually adjust the retention time for each campaign.

  • The default value is 168 hours, but can be modified per platform.

  • The retention time can be applied from a minimum of 1 hour to a maximum of 168 hours.

Go to the and log in with your developer account.

📢
Apple developer site