
Sending push messages
📌 Campaign creation consists of two major steps:
① Select message sending type and layout → ② Write message and set campaign operation information
Please be sure to read the Marketing Reception Required Reading section in the text.
How to send a one-time push message
Click the '+ Create Campaign' button.
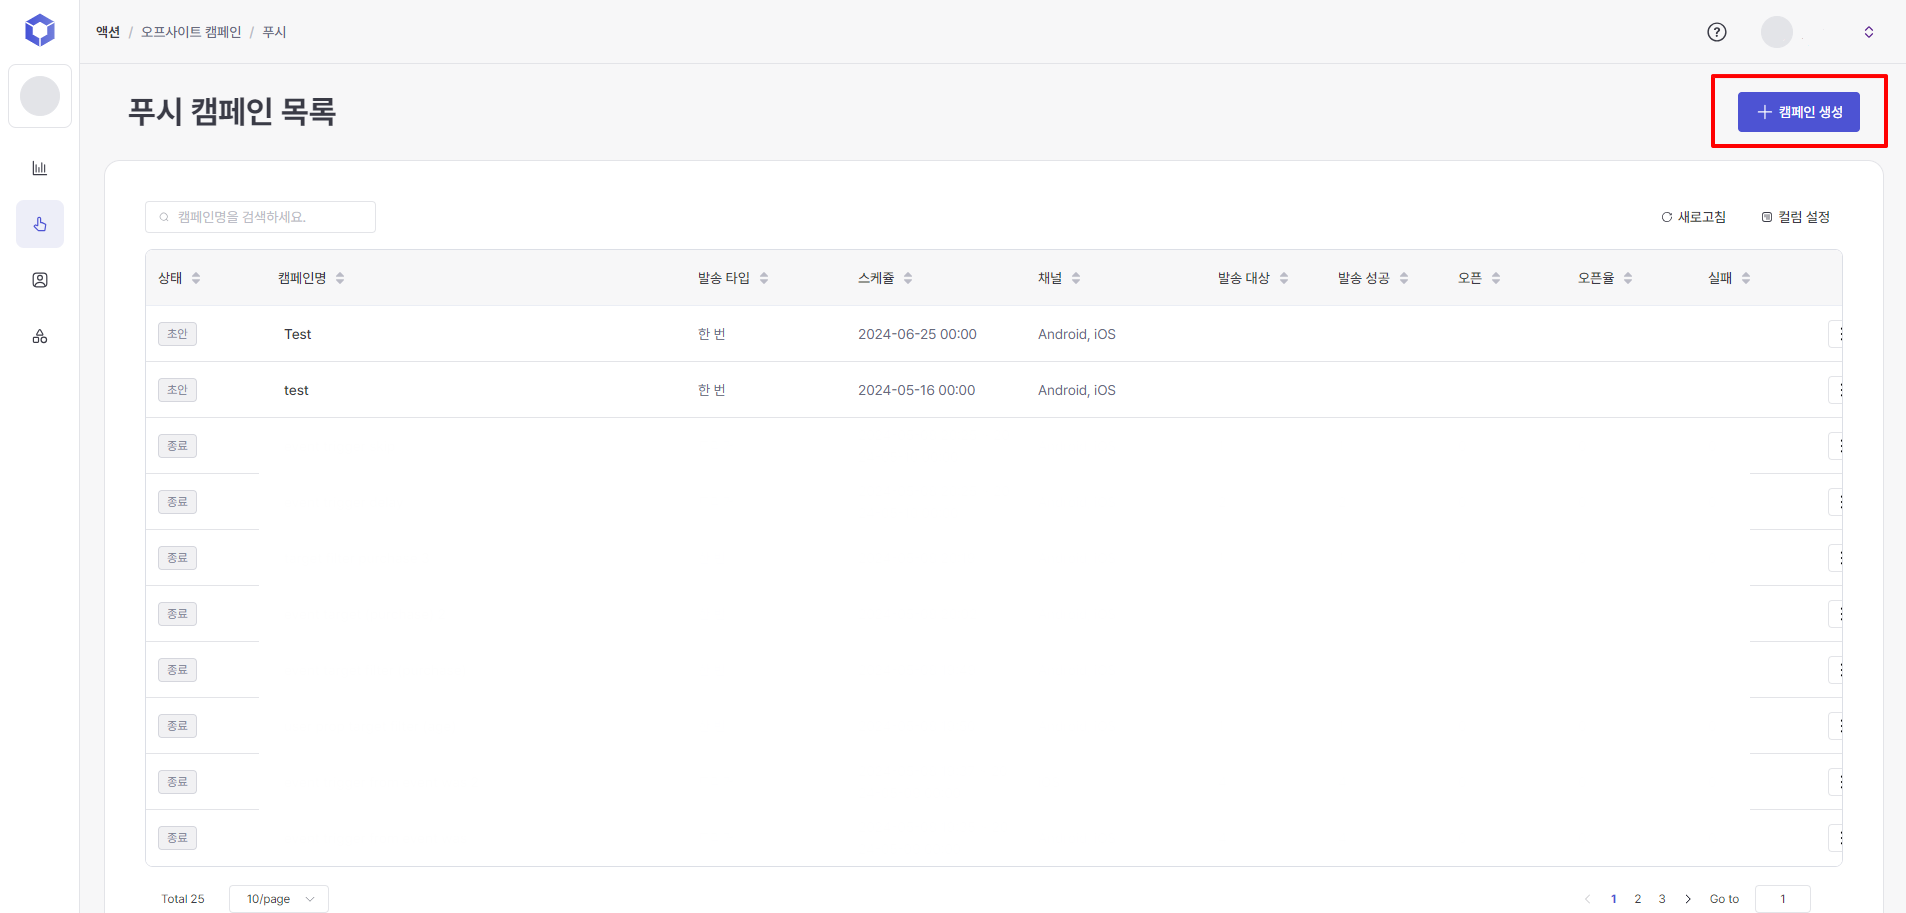
Select ‘One-time sending’ as the sending type.
Select a transmission channel, and multiple selections are possible.
Enter the title and body text on the push campaign creation page. You can apply personalized variable values and enter emojis in the title and body text areas.
How to use personalized variables
When you click the '{ }' button, a pop-up for setting personalized phrases will be displayed. If there is no personalized value when sending an actual message, the set alternative phrase will be displayed. The alternative phrase will also be applied and displayed when sending a test message.
Example of entering a personalized variable [name]
Default value: When entering 'customer'
When user information is available
: Hello, {&replaced name}.
When there is no user information
: Hello, customer.
User Profile Attributes Support
: Once sent, personalization variable data only supports user profile attributes.
If you wish to send promotional messages, please activate the 'Promotional Messages' toggle at the top right.
Things to keep in mind when selecting 'Advertisement' for push messages
In order to send advertising messages, the recipient's consent for 'Advertisement Notification' and 'Nighttime Advertising Notification' is required.
We provide properties for consent to 'advertisement notifications' and 'nighttime advertisement notifications'. Please check the document below and link the properties before sending it. (If not linked, it will be sent to all selected audience groups regardless of consent to receive.)
When clicking on a push message, you can choose between 'Open app' and 'Land to specific page'. You can add up to two buttons if necessary.
In the Message Additional Settings area, you can decide the sound, vibration, exposure method, and priority when receiving a push message.
[Notification Priority]
Normal priority: Transmit when the device is not in sleep mode.
High priority: Transmit regardless of the device's power-saving mode (when immediacy is required)
※ However, if a priority limit is applied, all subsequent messages will be processed with normal priority. Reference document:
Next, set up the sending schedule. At this stage, you can also enable or disable fatigue management (global fatigue settings).
Set your target by selecting an audience or using the target filtering feature.
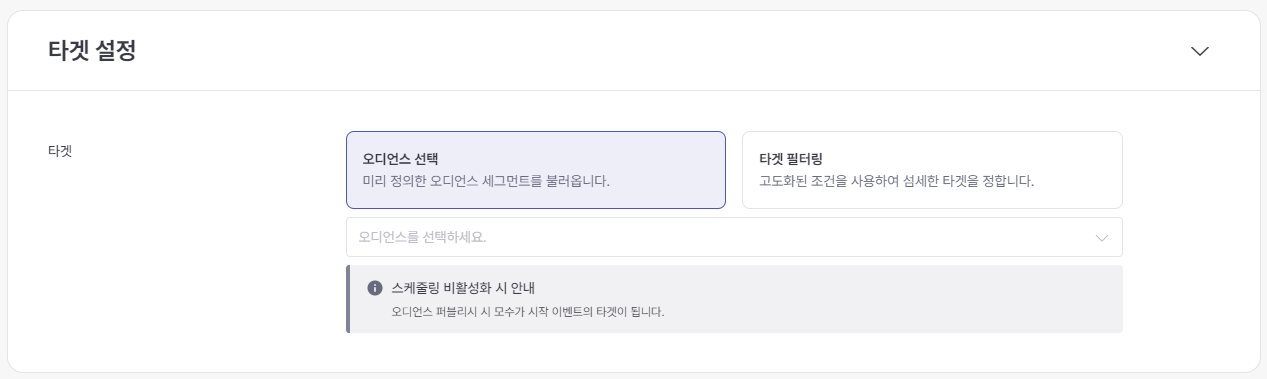
Audience Utilization Cases
Fine targeting using sophisticated conditions
To ensure that messages are sent only to users who have agreed to receive marketing, please set the marketing consent to true in the user profile conditions when setting up the audience.
Target Filtering Case
A feature suitable for quickly setting up campaign targets or not used repeatedly, with relatively simple filter support.
As with audience creation , please set the marketing consent to true in the user profile.
(Must read) Marketing consent note
Sending is possible when null or true.
If false, sending is not possible.
Since a message can be sent if there is no consent value (null), the value (true or false) must be passed accurately to the definer.
Please keep your marketing consent value updated via API.
Please also pay attention to the marketing consent value when linking offline data.
When linking, please be sure to refer to the relevant development documents.
- Setting notification consent information (Android)
Set up purchase conversions and custom conversion tracking. To track conversions, you must specify at least one click action in your message settings. Insert a link in the body or add a link to a button or image. For more information about tracking purchase conversions, see Setting a Purchase Conversion Window.
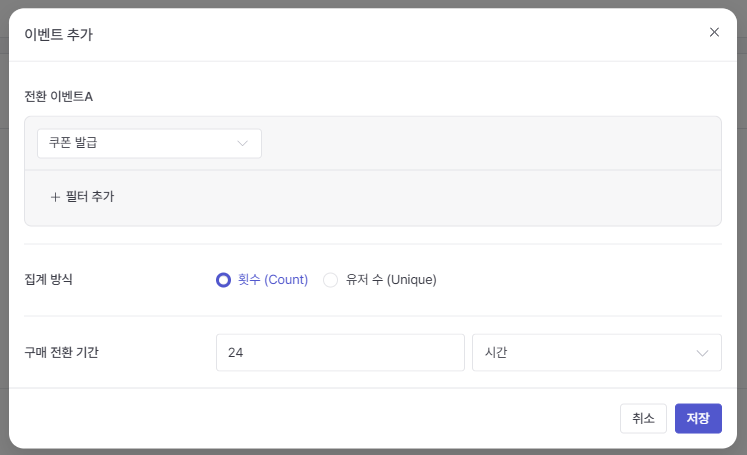
Custom Conversion Tracking
This feature allows you to add up to four events that you want to t rack conversions separately from purchases. Optionally, add events as needed. Custom conversion tracking is not affected by global settings and does not compete with other campaigns. Therefore, when a click action occurs, it is all aggregated and displayed in the detailed data screen.
Test sending
You can enter a push token and send a test message through the 'Test Send' function in the upper right to see how the message is displayed in a real environment.
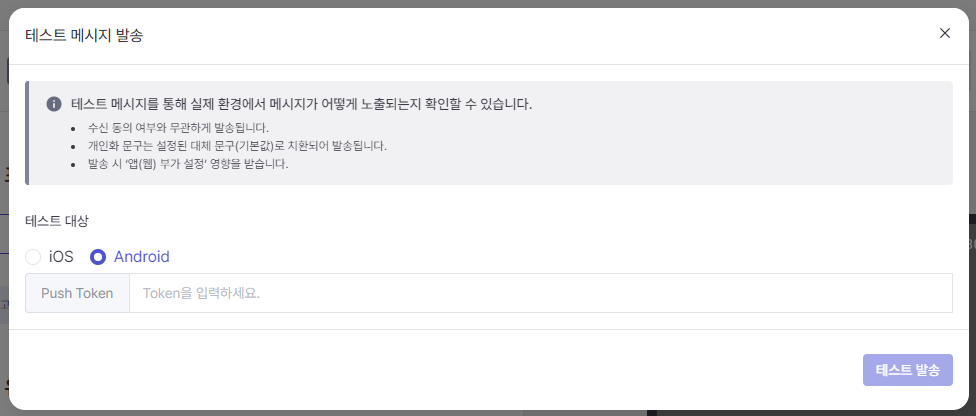
It will be sent regardless of whether you consent to receiving it.
Personalized text will be sent and replaced with the default text you have set.
When sending, 'App (Web) Additional Settings' are affected.
How to send trigger-based push messages
A message is sent when a specific event occurs to a specified target.
Click the 'Create Campaign' button.

Select 'Trigger Send' as the sending type. The details of the message settings are the same as when setting up a one-time push message.
How to use personalized variables
When you click the '{ }' button, a pop-up for setting personalized phrases will be displayed. If there is no personalized value when sending an actual message, the set alternative phrase will be displayed. The alternative phrase will also be applied and displayed when sending a test message.
Example of entering a personalized variable [name] Default value: When entering 'customer'
When user information is available
: Hello, {&replaced name}.
When there is no user information
: Hello, customer.
When selecting a trigger-based sending type
: In order to use 'event attribute' as a variable, you must utilize the attribute of the event set as the start event, which is the trigger condition. Both user profile attributes and event attributes are supported as personalized variables.
※ Product(df_items) attribute personalization phrase expression method
In DFINERY, Product Name(df_items) the property is a sub-property of the purchase(df_purchase) 이 event and is an array containing information about each product. When using Product Name(df_items) attribute, if the number of products is 2 or more, it is displayed as ‘{first product name} and n- 1 items’. Therefore, if you set a purchase event as a trigger, you can use the custom attribute of 'product name' or df_items when setting up personalization, and you can set the display method depending on whether the customer purchased one specific product or two or more.
example)
When customer A purchases one specific product
Example personalized message: Thank you, customer! Your 'smartphone' order has been completed. Check out more products!
When customer B purchases two or more products together
Example personalized message: Thank you, customer! Your order for ‘smartphone’ and 1 item has been completed. Check out more products!
Enter the schedule (campaign operation period). Set the conditions (triggers) that users must meet to send messages as start events and event properties. Set the end event, which does not send the campaign if it occurs during the waiting time for sending, like the start event. You can also activate or deactivate fatigue management (global fatigue settings) at this stage.
Waiting time for dispatch
Enter the waiting time for the push message you want to send when the user achieves a specific condition.
Campaigns will not be sent to users who perform a termination event during the waiting period.
Do Not Disturb Time
Enter your Do Not Disturb hours, and choose whether to not send messages during Do Not Disturb hours or to send messages after Do Not Disturb hours.
(Must read) Marketing consent note
Sending is possible when null or true.
If false, sending is not possible.
Since a message can be sent if there is no consent value (null), the value (true or false) must be passed accurately to the definer.
Please keep your marketing consent value updated via API.
Please also pay attention to the marketing consent value when linking offline data.
When linking, please be sure to refer to the relevant development documents.
- Setting notification consent information (Android)
- Setting notification consent information (iOS)
- Setting notification consent information (Web)
Set up purchase conversions and custom conversion tracking. To track conversions, you must specify at least one click action in your message settings. Insert a link in the body or add a link to a button or image. For more information about tracking purchase conversions, see Setting a Purchase Conversion Window. Custom Conversion Tracking This feature allows you to add up to four events that you want to track conversions separately from purchases. Optionally, add events as needed. Custom conversion tracking is not affected by global settings and does not compete with other campaigns. Therefore, when a click action occurs, it is all aggregated and displayed in the detailed data screen.
Defining Campaign Status
Draft
Status of the campaign you are writing before publishing
Atmosphere
Campaign Publish status → Can be restored to draft
Preparing for operation
Pre-onboarding the audience according to the audience schedule
Cancellation possible
In operation
Onboarding is complete and it is time to start and it is active
Cancellation possible
End
The end time has arrived
Error
Campaign execution is not in progress due to internal server issues
Need to check the situation when repeating
Cancellation of operation
Offsite campaign (push/KakaoTalk/text)
• Onsite campaign (in-app message) that can be cancelled during operation or in preparation
• Can only be stopped when in operation preparation or in operation.
No re-posting
Delete
Deleted campaign from console
Stop
To be developed in the future (only applies when setting repeat, in-app trigger)
Repostable
Limit rule
Push messages can only be edited when they are in the 'Draft' status.
When selecting a schedule, you can set it within a maximum of 100 days from the campaign creation date.
When setting a schedule, the time zone for the period cannot be set separately and follows the service time zone.
Advertising message Schedule setting is only possible from 08:00 to 20:00.
💡 Precautions when sending APP/WEB advertising messages
When sending APP/WEB advertising messages, sending may be restricted depending on whether you have consented to receiving marketing messages or consented to receiving messages at night. Please check the 'Message Sending Precautions Guide' below before sending.
Last updated