# Setting up 2-step authentication
DFINERY supports various functions in accordance with the policy to protect customer information.
This document guides you on how to strengthen security through two-step authentication when logging in.
## **N**eed for 2-step authentication
DFINERY accumulates and links various customer service information. You can enhance security through two-step authentication when logging into the console.
{% hint style="info" %}
Setting up two-step verification is optional, but we **recommend it** for **privacy reasons. As an organization owner** or **organization administrator,** you can require two-step verification for all users in your organization as follows:
All user mandates are possible after completing the 2-step setup.
\
**Path**\
Organization Management > Security Settings\

{% endhint %}
## Set up 2-step verification **authentication**
####
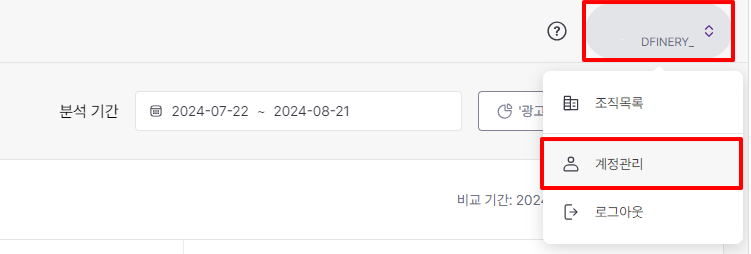
### **Open the account management window**
Click on the user profile area at the top right to open the 'Account Management' window.
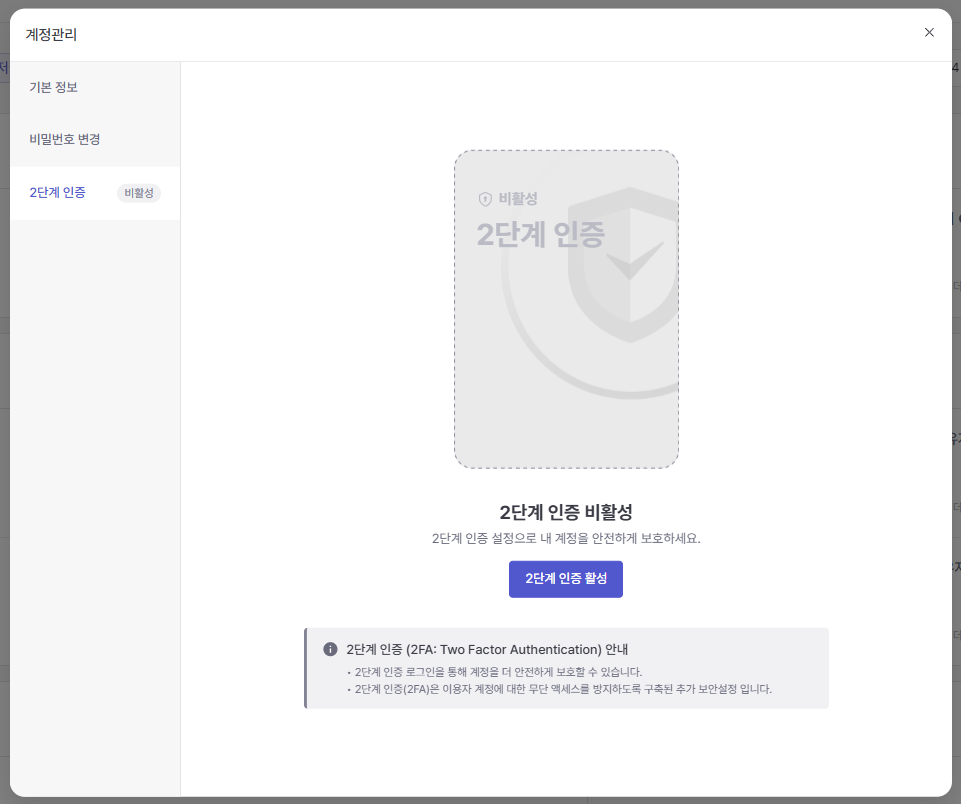
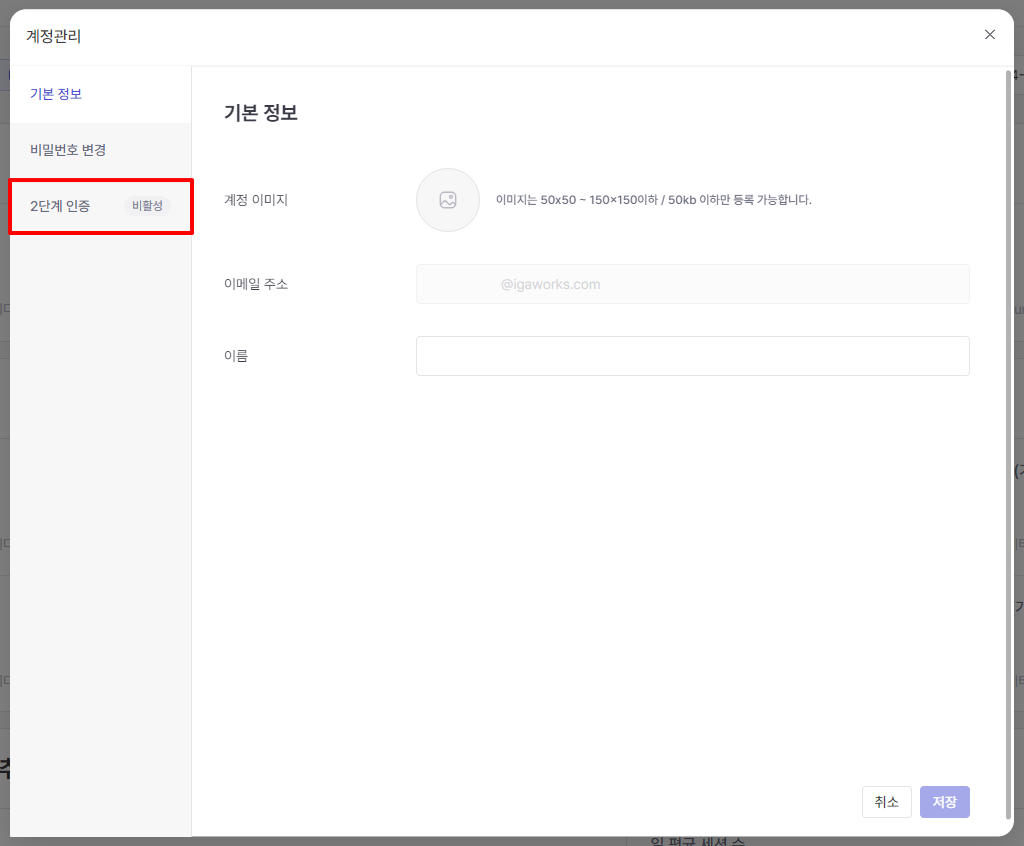
### Click the 2-Step Verification tab
When you click the 2-step verification tab, a screen will appear where you can check whether or not you have been authenticated.
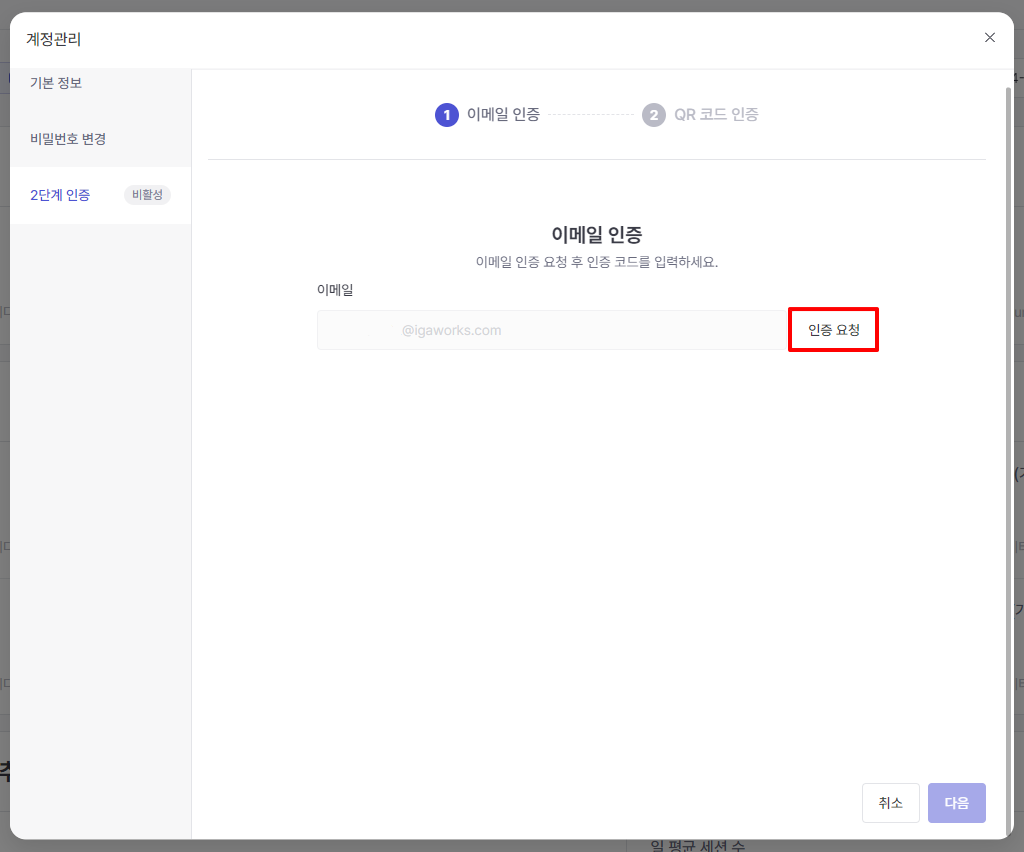
### **Click the Activate 2-Step Verification button**
When you click the 'Activate 2-Step Verification' button, you will be taken to the authentication screen. If you exit during authentication, it will not be saved.
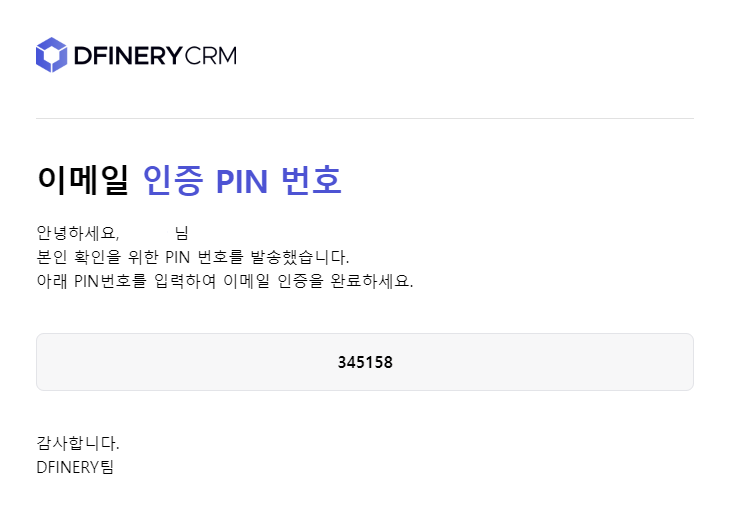
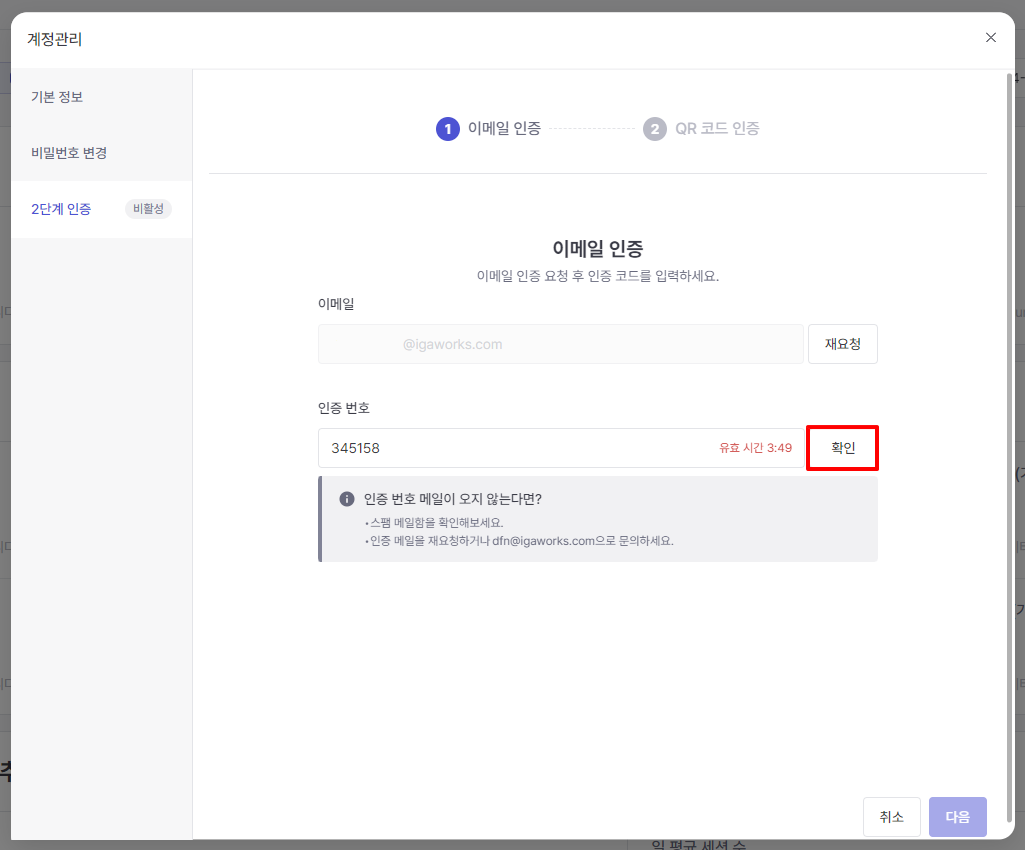
### **Request email verification**
The login email information you entered when signing up is automatically entered.
### **Confirm your email**
### **Enter authentication number**
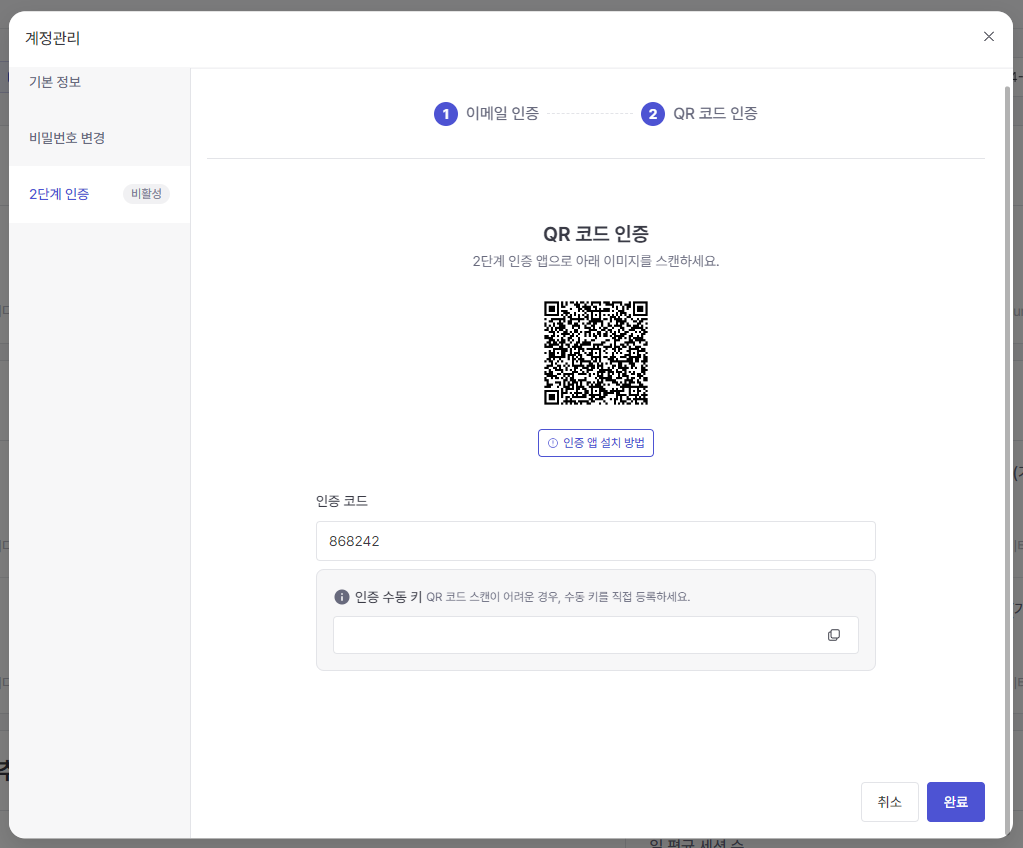
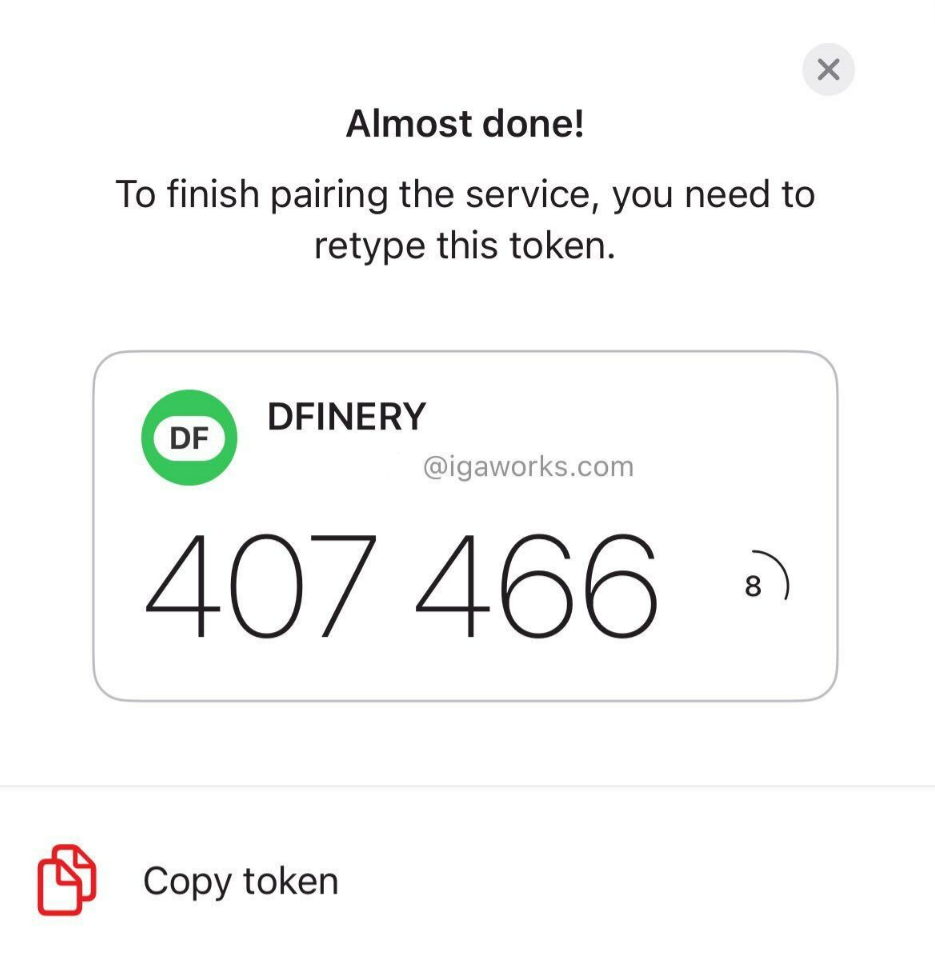
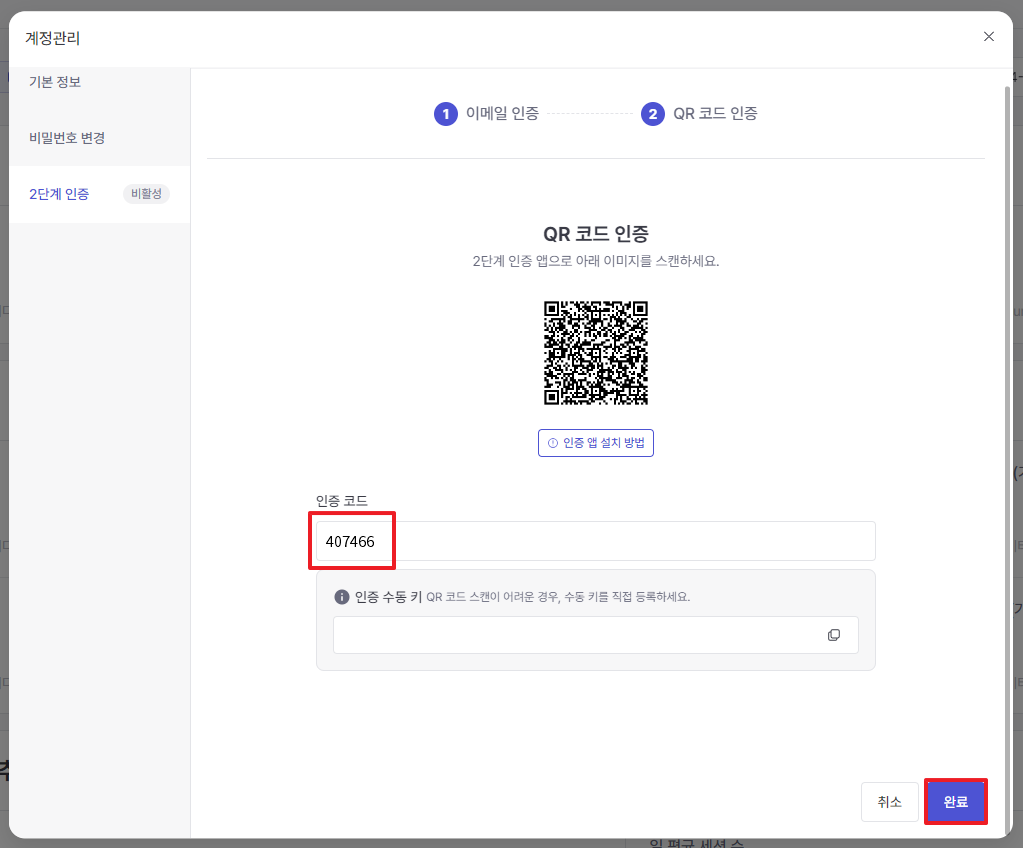
### **Scan QR code with 2-step authentication app**
Example using the 2FAS Auth app (iOS)
{% hint style="info" %}
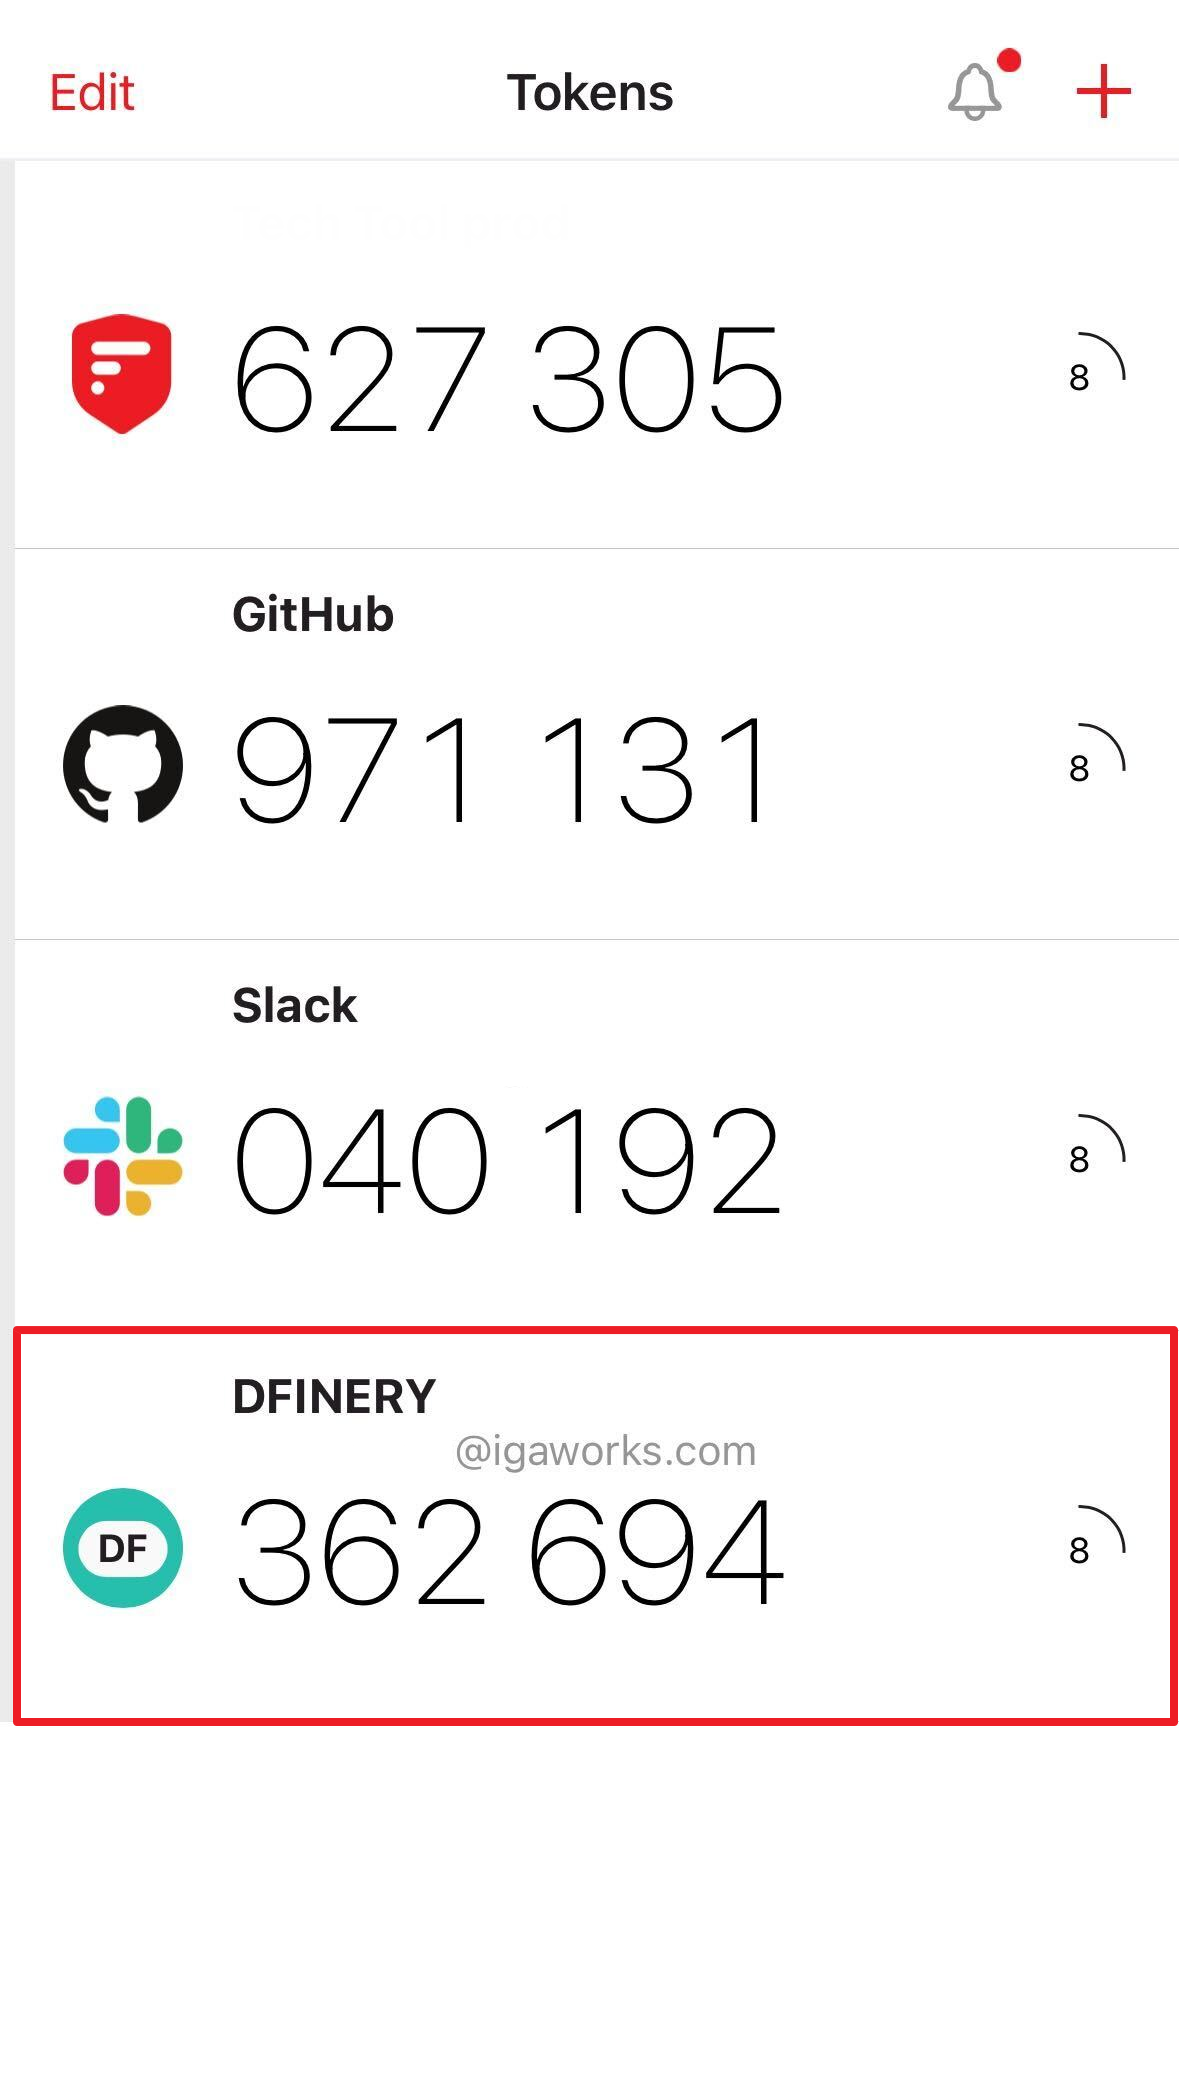
When you scan the QR code, **DFINERY** is automatically registered in the authentication app as shown above.
**If you do not have a 2-step authentication app, please install one of the following apps.**\
You may also use other 2-step authentication apps not listed below.
* Google Authenticator
\[[Android](https://play.google.com/store/apps/details?id=com.google.android.apps.authenticator2)] \[[iOS](https://apps.apple.com/us/app/google-authenticator/id388497605)]
* Microsoft Authenticator
\[[Android](https://play.google.com/store/apps/details?id=com.azure.authenticator)] \[[iOS](https://apps.apple.com/us/app/microsoft-authenticator/id983156458)]
* Authy
\[[Android](https://play.google.com/store/apps/details?id=com.authy.authy)] \[[iOS](https://apps.apple.com/us/app/twilio-authy/id494168017)]
* LastPass Authenticator
\[[Android](https://play.google.com/store/apps/details?id=com.lastpass.authenticator)] \[[iOS](https://apps.apple.com/us/app/lastpass-authenticator/id1079110004)]
* Duo Mobile
\[[Android](https://play.google.com/store/apps/details?id=com.duosecurity.duomobile)] \[[iOS](https://apps.apple.com/us/app/duo-mobile/id422663827)]
{% endhint %}
### **Enter the authentication number you verified in the app**
{% hint style="info" %}
**Authentication via manual key entry**
Each authentication app provides a function that allows authentication through manual key entry.
For example, using Google Authenticator, when you click the (+) button at the bottom right of the app, there is a menu called 'Enter setup key'.\
When you click, an account details entry page appears, and if you enter the items as shown below and directly register the authentication manual key, it will be registered in the authentication app in the same way as when you scan a QR code.
1. Account name: Enter the name you want to manage in the authentication app directly.
2. My Key: Authentication Manual Key Entry Area
3. Key Type: Select 'Time Based'
{% endhint %}
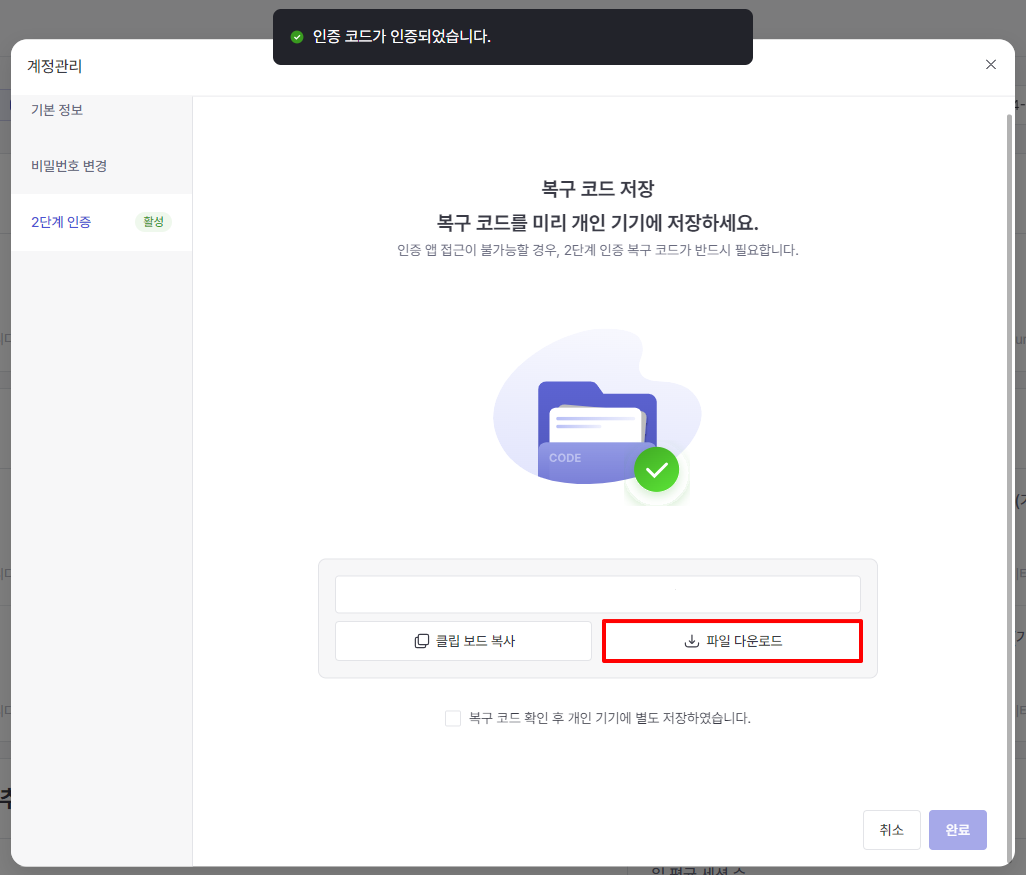
### **Save recovery code to your personal device (required)**
There are two ways to save your personal device, and you must check the final save checkbox to activate the 'Complete' button. Please be sure to download the recovery code in case of unexpected situations.
* Copy to clipboard
* Download file
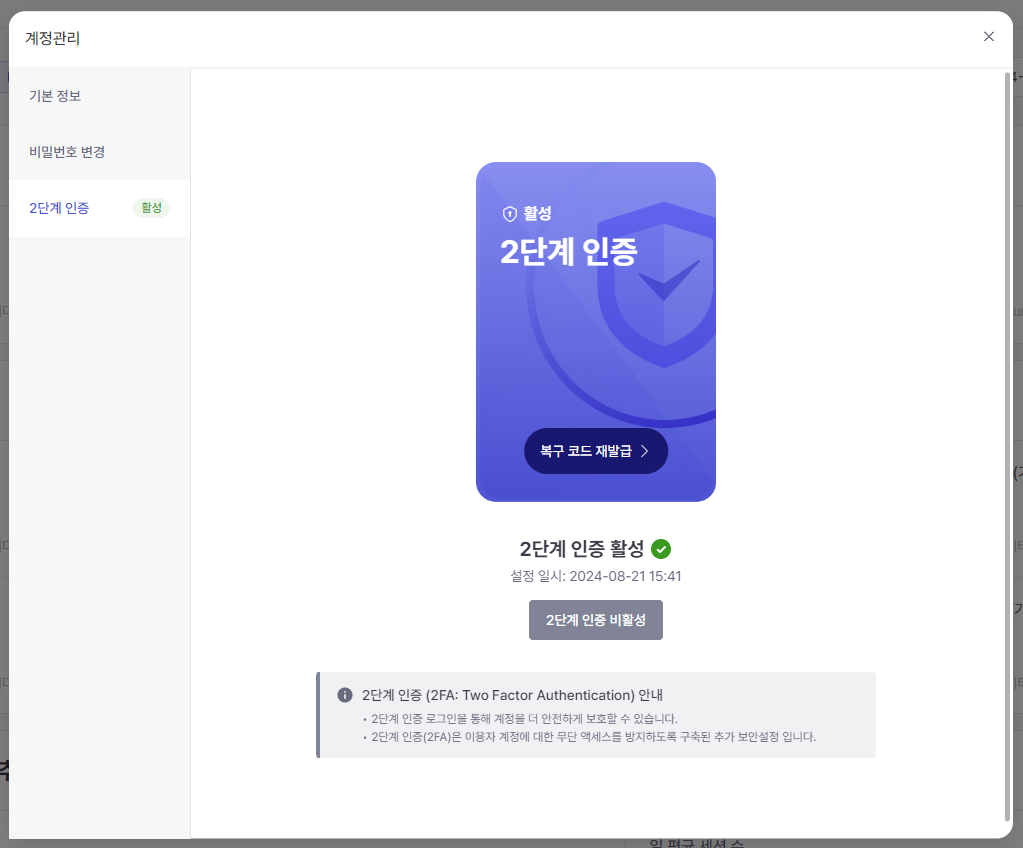
### **2-step verification completed**
## **Login flow after setting up 2-step authentication**
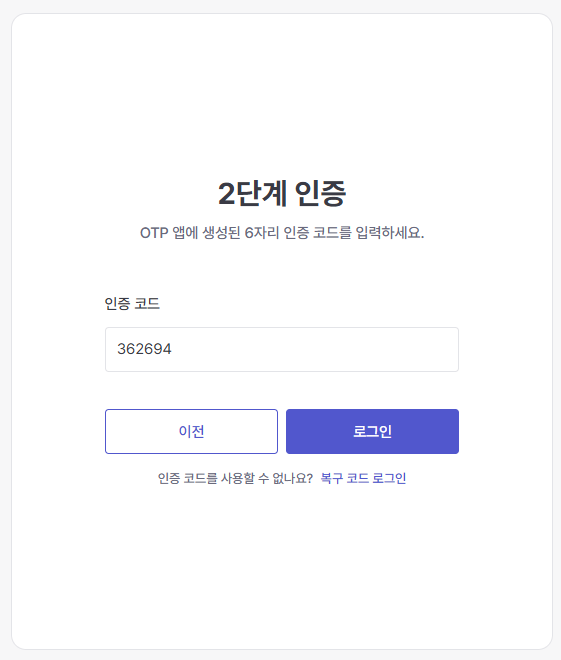
### **Enter your email and password**
### **2-Step Verification and Login**
Log in by entering the 6-digit authentication code generated in the OTP app as follows.
2FAS Auth 앱
2-step authentication login screen
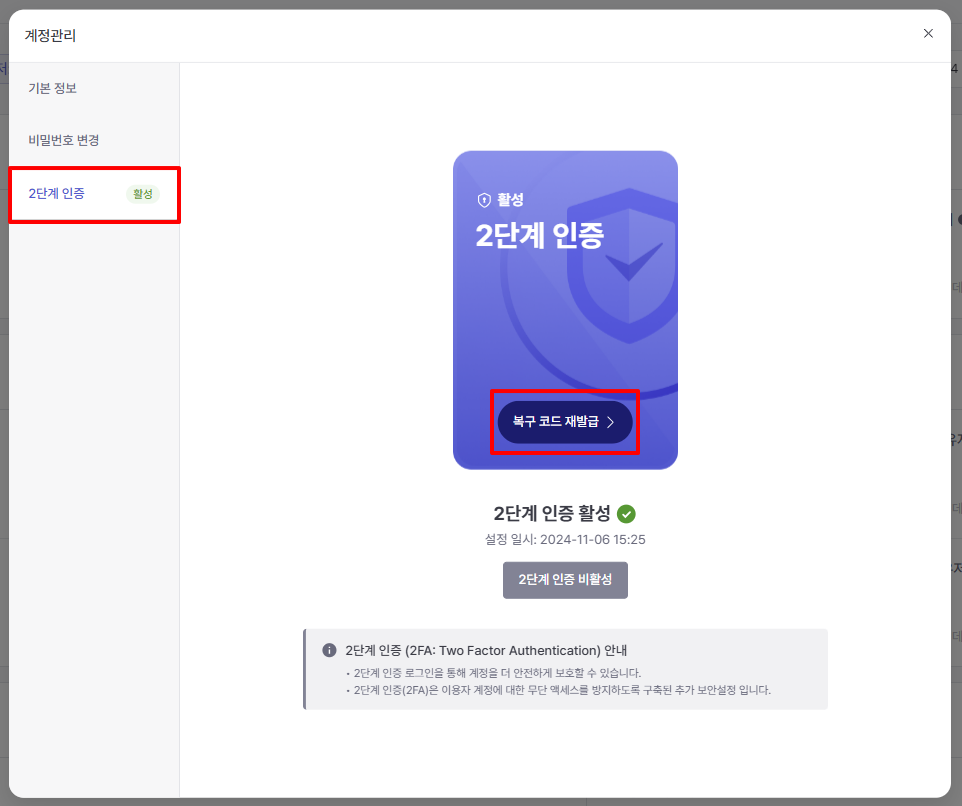
## **Reissue recovery code**
### **Click Reissue Recovery Code**
In the Account Management window, under the Two-Step Verification tab, click 'Reissue Recovery Code'.
{% hint style="danger" %}
When reissued, the existing recovery code can no longer be used.
{% endhint %}
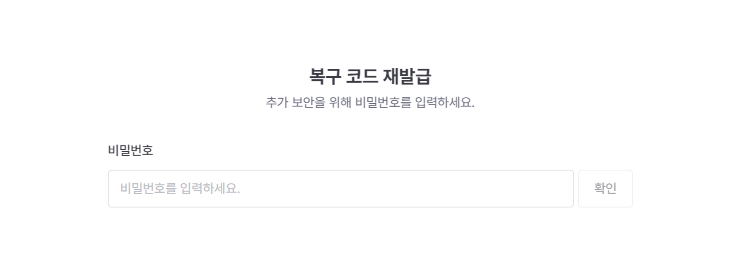
### **Enter your password**
After entering and confirming your password, click the 'Next' button at the bottom right to proceed.
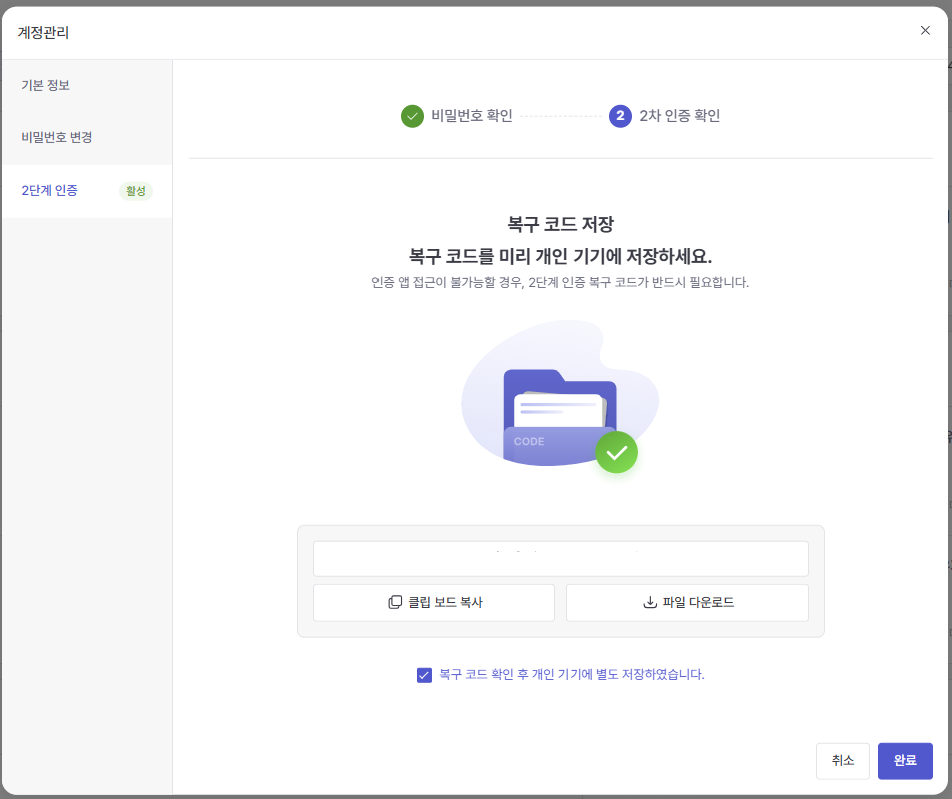
### **Save the reissued recovery code to your personal device (required)**
After saving the reissued recovery code to your personal device, check the box and complete the reissue.
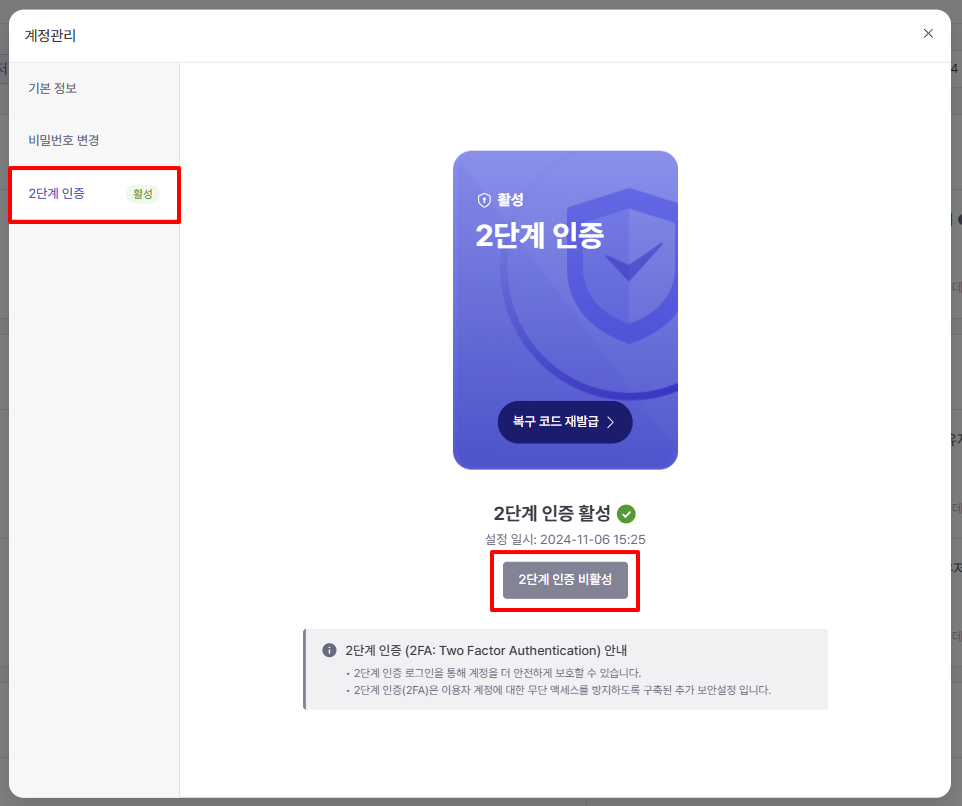
## **Disable 2-Step Verification**
### **Click Disable 2-Step Verification**
In the Account Management window, click the Disable Two-Step Verification button in the Two-Step Verification tab.
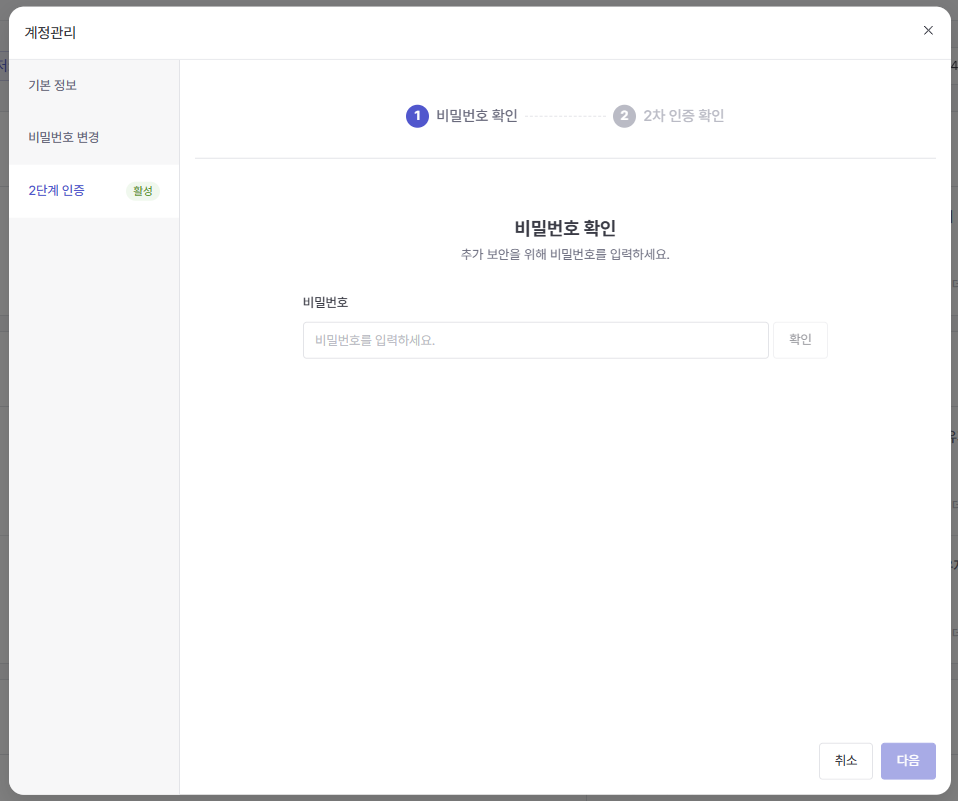
### **Enter your password**
After entering and confirming your password, click the 'Next' button at the bottom right to proceed.
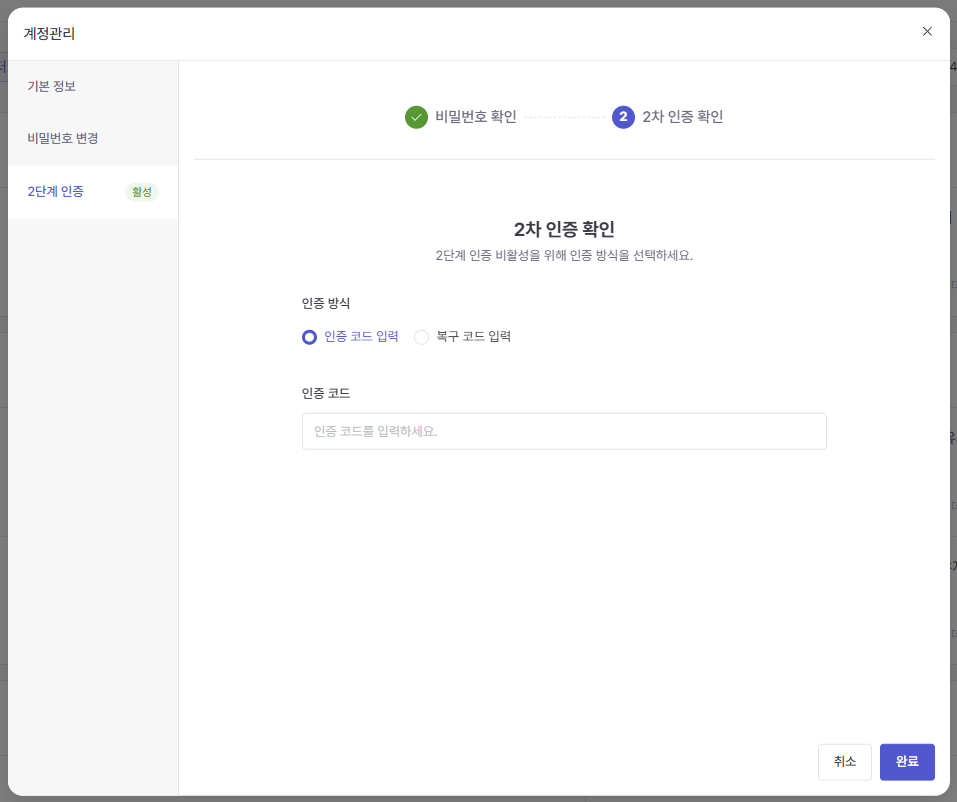
### **2nd authentication verification**
Complete two-factor authentication by entering either **an authentication code** or **a recovery code .**
{% hint style="success" %}
**Choose one authentication method**
* **Enter authentication code**
This method is the same as checking and entering the 6-digit authentication code through the 2-step authentication app when logging in after setting up 2-step authentication. ([Reference](https://docs.dfinery.ai/user-guide/begin-to-use-dfinery/security/2fa#id-2-6))
* **Enter recovery code**
Enter the recovery code you saved separately on your personal device. ([Note](https://docs.dfinery.ai/user-guide/begin-to-use-dfinery/security/2fa#undefined-5))
{% endhint %}
### **2-step authentication disabled**
You can see that two-step authentication has been disabled as shown in the following screen.


.png) {% endhint %}
### **2-step authentication disabled**
You can see that two-step authentication has been disabled as shown in the following screen.
{% endhint %}
### **2-step authentication disabled**
You can see that two-step authentication has been disabled as shown in the following screen.